Pioneer Squad | |||
|---|---|---|---|
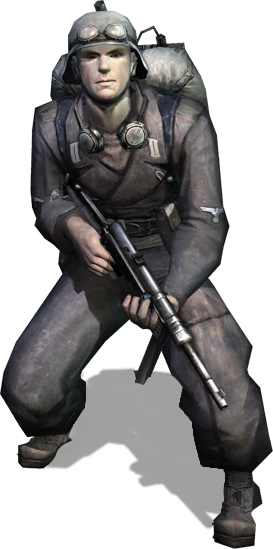 A Pioneer. | |||
| Army | Wehrmacht | ||
| Role | Multi-purpose repair and construction infantry | ||
| Men per Squad | 2 | ||
| Unit Cost |
| ||
| Upkeep per Minute |
| ||
| Prereq. | None | ||
| Produced By | Reich Headquarters | ||
| Cost to Reinforce |
| ||
| Health per Man |
| ||
| Infantry Type | Infantry | ||
| Basic Weapon | 2x MP40 Sub-Machine Gun | ||
| Open Weapon Slots | 2 | ||
| Max. Speed | 3 m/s | ||
| |||
| |||
| |||


Pioneer Squad is an two-man infantry squad fielded by the Wehrmacht in Company of Heroes. It is the basic builder unit of the faction, and one is provided for free at game start.
Overview[]
As with every modern military, the German Army maintains a large standing force of military engineers. Due to the nature of the Wehrmacht, particular focus was given to their "Pionere", the unsung heroes of Blitzkrieg.
Tasked mostly with bridge construction and fortification demolition, the Pioneers were multi-purpose individuals who helped keep Panzers rolling forward in the early war and helped keep Infantry and AT positions entrenched in the later part of the war.
Despite this, however, they were more combat-focused than contemporary engineering units. Focused on close-combat and generally the troops equipped with weapons like Flamethrowers, the Pioneers could tear down soldiers as well as they could buildings.
Company of Heroes presents a largely realistic view of Pioneers, being construction units with the potential to be close-combat specialists. With a large variety of abilities, Pioneers are a useful utility unit that comes at a low price to boot.
However, almost uniquely to Wehrmacht units, the Pioneers' performance in combat will almost universally be dictated by veterancy. Even when equipped with the Flammenwerfer, a base-level Pioneer should be used mostly for capturing undefended points, construction, and other secondary tasks. Any use in combat should be to support other units.
Pioneers equipped with Minesweepers should not be expected to take any serious part in combat at all, and will struggle with killing even the most basic units. They should be universally accompanied when near the front line and not expected to engage in combat.
Despite all this, Pioneers are still surprisingly durable and can be excellent as supporting units to other squads. Do not be afraid to let these troops get their hands dirty.
Weapons[]
Maschinenpistole 40 Sub-Machine Gun[]
The MP40 SMG is a rather weak, close-combat focused weapon. It fires 3 bursts of 14 bullets before a 3-second reload. A successful hit deals 5 points of damage- though against most Infantry units the damage is reduced to just 2.5.
Its maximum range is 20 meters, though the weapon is only really effective at 10 meters or less due to its low accuracy. As such, a Pioneer Squad must be at nearly point blank to get any effective use out of its MP40s- which can be a dangerous job, though not an impossible scenario, especially when supported by other Infantry.
Flammenwerfer 42[]
After the appropriate upgrade, one of the members of the Pioneer Squad replaces his MP40 with a Flamethrower- the Flammenwerfer 42, a variant of the famous Flammenwerfer 41, designed for urban combat on the Eastern Front.
The Flamethrower fires in 4-6 second Jets that range up to 20 meters. Each second the flames deal between 15 and 40 points of damage, and there's a 5 second cooldown between bursts.
Unlike practically every other weapon in Company of Heroes (save other Flamethrower weapons), the Flammenwerfer actually does higher damage to units in cover. Generally, the heavier the cover, the more damage the Flammenwerfer will do- Infantry in Buildings or Trenches will be burnt to a crisp in seconds if they don't abandon their post.
Strategy[]
There are essentially 4 ways to use Pioneers. in practice, these four jobs will cross over with each other and one squad will fill multiple roles in practically every match.. This is simply a testament to the versatility of the squad.
The first and most basic use of Pioneers is Base Building- perhaps the most essential job the unit has. Base Building is simply the construction and maintenance of buildings in your HQ sector- very important given that ultimately all other units and Veterancy are derived from these structures. The Pioneer is indispensable in this regard, and without at least one pioneer focusing on this at every tech level, it's highly unlikely you'll ever win a game.
The second use of the Pioneer is General Construction & Maintenance. Bases are not the only sectors ripe for building and expansion- unless a neutral building is in a convenient spot in a sector, most defenses on the frontlines start with Pioneers. With structures like Bunkers, Sandbags, Mines, and Tank Traps available, a Pioneer squad on Construction duty will almost always have its hands full, setting up obstacles to thwart enemy movements and support for friendly units. Pioneers doing this will also often spend a lot of time salvaging wreckage for munitions.
The third use of the Pioneer is Support Pioneer. Typically equipped with a Minesweeper, Support Pioneers are primarily tasked with keeping an offense going- cutting enemy Barbed Wire, defusing their mines, and making sure friendly vehicles are in tip-top shape. They are also commonly seen occupying Halftracks during battle to keep their guns firing.
Finally, Pioneers can be used as Combat Pioneers. Equipped with Flamethrowers, these units are tasked with killing units, buildings, and most commonly, units inside of buildings. At 120 Manpower and 50 Munitions, Combat Pioneers are perhaps the most cost-effective combat squad in the entire game, and are particularly well equipped to destroy enemy constructions.
Abilities[]
Medical Kit[]
- Heals squad over time
- Costs 30 munitions
After activating this ability, the Pioneer Squad starts to recover health. This ability can always be used in friendly territory- however, after escalation to battle phase, a better version of this ability, the Field Medical Kit becomes available, allowing infantry squads to heal anywhere on the map.
Each soldier of the squad recovers health at 72 points per minute. There is one drawback: From activation squad's speed will be reduced for 18 seconds. With just 2 men in the squad, it's essential Pioneers stay at the maximum possible health- or else they risk quick and painful death at any moment.
Salvage Wrecks[]
- Salvages Munitions from wrecked vehicles
This ability causes Pioneers to begin salvaging the remains of a destroyed vehicle. During this, they have the same vulnerability they would during a repair.
As the Pioneers salvage the wreckage, the wreck will dispense 25 munitions every few seconds until eventually disappearing. Multiple PIoneer Squads can salvage the same wreck, but the total amount of Munitions harvested will be the same.
Barbed Wire Cutters[]
- Instantly cuts through Barbed Wire
Pioneers can utilize Barbed Wire Cutters to dismantle Barbed Wire- be it constructed by enemy, by ally, or just existing already on the map.
This is most useful in the early game. Later on, it's far more useful to simply have a medium or large vehicle roll through the wire to allow advancing Infantry through.
Repair[]
- Repairs a vehicle or building for 5 health per second
- Repairing units take more damage
- Costs 5 manpower per minute
One of the Pioneer Squad's signature and most essential abilities, Repairing fixes both vehicles and constructed buildings while exposing the Pioneers, causing them to not only be disarmed, but also to take 50% more damage (until upgraded to Battlefield Repair at Veterancy 3, at which point it's reduced to 25%).
Repair can fix up Anti-Tank guns, but often not to any significant degree, as the squad seemingly declares the gun fixed after just a touch up. It cannot repair garrisoned neutral buildings on the map unless said building is specifically designed for it, such as Mortar Bunkers or a Pantherturm.
Reverse Zeal[]
- Hidden passive ability
- For every additional Pioneer unit in 10 meter radius increases damage taken by 5%
- This counts Pioneer ''units'', not individual Pioneers
After years of being maligned for spammability, Pioneers suffer Reverse Zeal, making them far less valuable in large numbers. This malus is noticeable even when two squads are paired together- however, it will likely take several squads to become less valuable than the added firepower.
Regardless, try to separate your Pioneers as much as possible, especially those not intending to actually fire off rounds in combat.
Production[]
The Pioneer Squad is responsible for building all Wehrmacht structures and fortifications. Being specifically kit for doing so, they also have the added advantage of building faster than other Infantry, as well as being able to repair what they've created.
Barbed Wire[]
- Obstacle, impassable to Infantry
- Build Time: 2.5 seconds per piece
Barbed Wire consists of thick metal wires littered with spikes sharp enough to pierce human flesh. In-game, Infantry squads will make no attempt to go through wire and will simply attempt to go around it like they would with standard obstacles found commonly in the maps. This lets you prevent enemy Infantry from taking certain paths, useful for slowing their movement, forcing them to pass defenses, or entirely restricting their access to certain parts of the map- keeping in mind that your own infantry are also not allowed to move through.
It is moderately resistant to firepower itself, though will not stop bullets from passing through either side. Most vehicles can simply run over wire, destroying it instantly. Enemy Engineers and friendly Pioneers can dismantle Barbed Wire outright.
Barbed Wire is mostly useful at the very start of the game, though can be combined with Tank Traps to make an obstacle that enemies simply have to stop and deal with. So long as enemy Engineers and Vehicles are kept away, they are best used to prevent Infantry from flanking or avoiding MG setups, as well as direct them away from more vulnerable strategic points.
Sand Bags[]
- Provides Heavy Cover for Infantry units
- Build Time: 6 seconds per piece
Sand Bags are man-made cover for infantry. Infantry units behind sand-bags are in Heavy Cover, making them less vulnerable to direct damage and Suppression. They are also slightly less vulnerable to explosives and artillery fire compared to troops in the open.
Like Barbed Wire, Sand-Bags also act as infantry obstacles. They give passing-by enemy infantry units a good place to take cover as they move, and therefore are not as effective in preventing movements as Wire, though it has the advantage of not being able to be cut by Engineers or Pioneers.
Sandbags are useful for a temporary defense- giving Infantry units a place to stay while waiting for either a known incoming attack or just while waiting for a moment to strike out in offense. They're also good as a more permanent cover for units that can't garrison bunkers or buildings, like Mortars.
Tank Traps[]
- Obstacle, impassable to most vehicles
- Build Time: 15 seconds per piece
Tank Traps are stubborn obstacles that do exactly what they say to a tee- they have moderately high HP, and block all Vehicles larger than a basic recon vehicle from moving past. Unlike Barbed Wire, no unit has an ability to clear Tank Traps on command- they must be destroyed outright.
Tank Traps are double-edged swords: While convenient for preventing enemy vehicles from crossing into your territory, it prevents you from doing the same in kind in a comparable fashion. Given this fact, they are most often built to prevent enemy vehicles from committing flanking maneuvers rather than closing off major roads.
Heavy Tanks can crush Tank Traps instantly- though you yourself will mostly be doing that, as only the Pershing and the Churchill family can accomplish that on the allied side. M4 'Crocodile' Shermans can also upgrade with a Bulldozer, allowing them to clear traps out.
Bunker[]
- Garrisonable fortification
- Can be further upgraded
- Costs 150 Manpower
- Build time: 30 seconds
Bunkers are a major defensive building for the Wehrmacht, able to be upgraded in a variety of ways. At base, they provide very heavy cover for any Infantry unit aside from those who have to set up a support weapon heavier than the MG42 .
They can also produce the Goliath, a remote-controlled bomb able to demolish structures and vehicles, though at quite a hefty resource cost.
Bunkers should be a fixture of any defensive setup planned to be long-term. They should be built not only with positioning but cost of upgrade in mind. For more information on the upgrades, see the separate Bunker article.
Observation Post[]
- Secures a friendly Strategic Point and increases resource production in that sector
- Costs 200 Manpower
- Build Time: 15 seconds
Observation Posts are the way the Wehrmacht secures sectors, increasing their income. They are constructed around a point, preventing the enemy from capturing said sector until the building is destroyed. They have moderate health, though take full damage from every kind of weapon.
Observation Posts are a great way to slow down a potential enemy advance- every additional second an enemy has to wait to take over your point is another second you get its resource supply, another second you have to try and stop the enemy from taking it, and perhaps most importantly, another second an enemy is not capturing even more points to continue his advance.
High Fuel and Munitions points should be the top priority for Observation Posts- not only will their construction keep them out of enemy hands and prevent you from having to wait out the long process of capturing the point again, but the bonus to resource output is most noticeable on the already high-output points. Sectors without an associated resource have little benefit resource-wise, but often are large, quickly-captured points which can connect your HQ to portions of the map, making them another prime target for OPs.
Mines[]
- Hidden bombs that explode when enemy units walk/drive over them
- Costs 25 Munitions per piece
- Build Time: 5 seconds per piece
Land Mines are covert explosives, used to harass enemy units moving through the map. The Land Mines are built in visual sets of three, but practically are treated as one object a piece. When an enemy unit passes over a mine, the mine detonates- this will instantly suppress any Infantry unit that attempts to cross over it and usually immobilize any vehicles.
Mines are best used completely covertly, to cover roads, points, or flanks that your units might face, in cases where barbed wire or tank traps wouldn't be enough- though they run the risk of never being set off, meaning you have just entirely wasted 25 munitions. Mines are very rarely lethal to a full-health unit or vehicle, though it is not uncommon to see an already-damaged soldier or vehicle lost to them.
Some units have passive mine detection, but for the most part mines can only be detected and swept by using Minesweeping equipment, available to builder units for both Allied factions.
88mm Flak 36 AT/AA[]
- A powerful Anti-Tank and Anti-Aircraft emplacement
- Requires "88mm Flak 38" upgrade from the Defensive Doctrine
- Costs 400 Manpower, 75 Fuel, 11 Population Cap
- Build time: 30 seconds
The Flak 36, often referred to as the "Flak 88" or simply "88", is an 88mm gun that, despite being technically built as an AA platform, is more useful as a heavy Anti-Tank gun.
With long range and good accuracy against vehicles, the Flak 36 can destroy any Allied armor exposed to it in short order, though the gun is immobile, and therefore, can be easily shelled by Artillery or overrun by Infantry. It is also at the mercy of placement- the gun is of no use if it's too far from enemy lines or obstructed.
It can also shoot down planes or buildings, but is far less useful in either of these roles, and should not be seriously considered as the best unit for either of these situations. The Flak 36 is a far cheaper solution to enemy tanks than the late-game Panzers, and can turn away even the Pershing consistently if properly supported.
Base Buildings[]
Base Buildings are important to every game of Company of Heroes. Pioneers should build them at the earliest opportunity, and make sure that they are appropriately spaced out so you don't fill up the base sector before they're all completed. If the Defensive Doctrine has been chosen, keep in mind the MG42s that will be placed on their roofs- they will be able to deter nearby Infantry, potentially even outside of your base sector.
Veterancy[]
The Pioneer Squad gains veterancy through Support Team Upgrades at the Kampfkraft Center. These upgrades apply to both existing and newly constructed Pioneers, and are cumulative with each other.
No Veterancy:
| |
 |
Level 1 Veterancy:
|
 |
Level 2 Veterancy:
|
 |
Level 3 Veterancy:
|
While all Veterancy upgrades are helpful to the Pioneer squad, Veterancy 2 is the really crucial upgrade here, as it makes Pioneers far more sturdy in combat- giving them leeway to operate near the front line and letting them make better use of the Flamethrower upgrade if applicable. Given the likelihood that you will hit Support Veterancy 3 in every game anyway, Pioneers will likely not steer your decision, though they will certainly benefit from it.
Tips[]
- Don't wait until you have your Wehrmacht Quarters up- on most maps, you generally want to send at least your first Pioneer Squad out to capture points, since you have enough manpower to build additional squads on top of the cost of your starting building.
- Planning is essential with Pioneers- nothing's worse than waiting for a new squad to arrive. Have a squad ready to deploy before they're needed!
- Pioneers will often be priority targets for Allied players, seeking to take them out for easy unit and Company Commander XP- you can often use them as a distraction while another unit takes them out.
- Avoid using Pioneers to crew weapons, as this will consume the entire squad on top of leaving the weapon undermanned.
- Keep your Pioneer squads busy- there's almost always something they could be doing, given their variety of possibilities.
- In combat, keep your Pioneers as still as possible- their weapons are for more effective standing than running.
Weaknesses[]
The small squads Pioneers come in are their biggest downfall- though they are tough individuals, they cannot be expected to fight without support. Worse than that, the second one of the squad members drops dead, you now have a unit fighting at half efficiency and in constant danger of being wiped out- therefore, any fast and hard method of dealing with Infantry can kill Pioneers. Snipers and Marksmen can kill a Pioneer squad very quickly indeed.
When alone, a Pioneer squad is almost defenseless, easily able to be overrun by any Infantry section- a Flamethrower-equipped Pioneer squad will at least be able to take a few individuals down with it but almost never a whole squad.
Pioneers are particularly vulnerable when building or repairing something, as they often will be- even if whatever's being constructed or repaired could destroy the unit attacking the Pioneers, often just picking them off during the process can cripple the construction.
Finally, their cheap cost does not actually mean efficiency- at 60 manpower a head per full construction, they are quite expensive for the efficiency of an individual soldier, which makes reinforcement surprisingly costly considering the ease individual Pioneers are killed.
Quotes[]
When assembled:
After destroying enemy unit:
When selected:
When wounded and selected in battle:
Gallery[]
")
| Wehrmacht Arsenal | |||||||
|---|---|---|---|---|---|---|---|
| Base Structures | |||||||
| Infantry Squads | |||||||
| Support Infantry | Pioneer Squad · MG42 Heavy Machine Gun Team · Mortar Team · Sniper · Officer · Nebelwerfer · PaK 38 AT Gun | ||||||
| Light Vehicles | |||||||
| Medium Vehicles | |||||||
| Heavy Vehicles | |||||||
| Defensive Structures | |||||||
| Other Structures | |||||||
| Doctrines | |||||||
| Doctrine-specific Units |
| ||||||
| Doctrine-specific Structures |
| ||||||